
Garden Salsa Recipe for Canning (Certified Safe)
A quick safety note first. This recipe is certified by the Utah State University Extension Service. Do not change the amount of onions, tomatoes, peppers, or vinegar in this recipe. Those amounts keep it safe for canning. You can find other safe, certified recipes from your state’s Extension Service or the Ball Book of Canning.

There is nothing quite like opening a jar of your own garden salsa in the middle of winter. All that summer flavor, put up and waiting on the shelf. The catch is that most folks think canning salsa means either standing over a pot for hours to cook it down, or worrying the whole time about whether they did it safely.
This recipe fixes both. It is certified safe by the Utah State Extension Service, so the amounts are already worked out for you. Instead of simmering for hours to thicken it, we stir in a third of a cup of E-Z Gel, and it thickens perfectly in minutes. That secret means you can actually get this batch done on a busy fall afternoon. Let me walk you through it.
GET 10% OFF E-Z GEL UNTIL 10/07/26
Use Coupon Code: PSJHWWGN
RECIPE
Garden Canning Salsa

Recipe
Good garden salsa starts with ripe tomatoes, fresh from the vine. Choose ones with slightly firm flesh and a smooth, bright red peel. These are the sweetest, and they keep the salsa from turning bitter.
Ingredients
- 5 pounds (10 c.) tomatoes, peeled and diced (~13 large)
- 1 pound (3 1/2 c.) onions, diced (~2 large)
- 2 pounds roasted peppers (a combination of bell, Anaheim, and jalapeño, to your taste)
- 1/2 cup tomato paste
- 1 cup 5% apple cider vinegar
- 3 t salt
- 1/2 t black ground pepper
- 1/3 cup E-Z Gel
Yield: 6 to 7 pints. Do not change the amounts of tomato, onion, pepper, or vinegar. They are what keep this recipe safe.
Instructions
Step 1
Peel the tomatoes by blanching. Dip them in simmering water for about 30 seconds, then move them straight into ice water for about a minute, or until the skins split. Cut out the core and any imperfections. The skins will slip right off with your fingers. Cut the tomatoes into eighths and set them aside.
Step 2
Roast the peppers in the oven or on a barbecue grill. Once the skins begin to blister, pop them into a paper bag and let them steam for about 10 minutes. This softens the skins so they peel easily, and lets you remove most of the seeds to keep the heat balanced.
Protect your hands with clean rubber gloves while you peel the peppers. Then chop the peppers by hand or in a food processor until small and evenly minced.
Step 3
Peel the onions and finely dice them to match the peppers.
Step 4
Add 5 pounds of peeled and diced tomatoes to a very large pot, along with 1 pound diced onions, 2 pounds roasted peppers, and 1/2 cup tomato paste.
Step 5
Add 1 cup of 5% apple cider vinegar. This one matters. It lowers the salsa’s pH so no dangerous bacteria or yeast can grow.
Add 3 t salt and 1/2 t pepper. We recommend not adding more spices at this time.
Step 6
Turn the heat to medium. Stir frequently. As it cooks, the salsa will start to break down. Now blend in 1/3 cup of E-Z Gel and let it sit for 3 to 5 minutes to reach its final thickness while you prepare your jars. If needed, add more salt and pepper to taste.
Step 7
Ladle the hot salsa into freshly cleaned, hot pint mason jars. Leave a half inch of headspace so the jars can seal properly.
Step 8
Prepare your lids. Check the instructions on your lid box to see whether your lids call for a hot-water or boiling-water process. Wipe the rims of your jars clean. Cap each jar and tighten the ring until it is just finger-tight, not so loose that anything can shift, but not so tight that it is hard to remove. A ring that is too tight can actually keep the jar from sealing.
Step 9
Process in a water bath. Fill a large boiling-water canner half full and bring it to a simmer. Add a splash of white vinegar to prevent hard water spots. Place your filled jars in the canner and make sure the water covers about 2 inches past the tops.
Note: This is called hot packing. Hot jars require hot water to prevent cracking. If you need to take a break before processing and your salsa and jars have cooled considerably, start with cooler water.
Bring it to a rolling boil, then set a timer by your elevation: 35 minutes at sea level, 40 minutes at 1,000 to 3,000 feet, and 45 minutes at 3,000 to 6,000 feet.
Step 10
When they are done, carefully lift each jar onto a soft, dry towel using proper heat protection. Try not to jostle them until they have fully cooled. You might hear a popping or clicking sound, and that is a good thing. It means your jars are sealing. Once they’re cool, press the center of each lid; if it doesn’t flex, it’s sealed. Any jar that didn’t seal goes in the fridge to enjoy first. Then remove the rings and store your salsa in a cool, dark place until you’re ready to enjoy it.
Pro Tip: Hold off on extra seasonings until you open a jar. The flavor keeps developing through canning and as the salsa ages, so seasoning at the start can turn it bitter. Wait, and you can tailor each jar to whatever you are serving with it. One more thing: fresh canned salsa tends to get hotter as it sits, so do not worry if it seems a little mild right now.
SERVING IDEAS
A Word on Canning Safety
The apple cider vinegar in this recipe is not just for flavor. It lowers the pH so that dangerous bacteria or yeast don’t grow in your sealed jars. The main concern with canning is botulism, a deadly bacterium that can survive the canning process if the recipe lacks the proper acidity. That’s why this recipe is certified, and why the amounts of tomatoes, onions, peppers, and vinegar must stay as written.

E-Z Gel is a non-gmo, corn-based instant food thickener, certified as a canning-safe food thickener by the Utah State University Extension Service. It has been tested to withstand canning temperatures and meet safety standards. Always use brand-certified caps and jars to ensure a proper, safe seal.
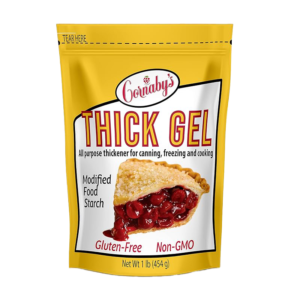
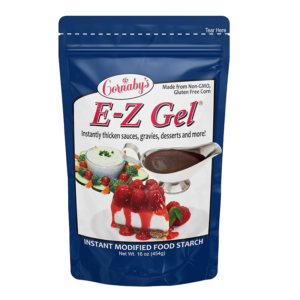
GET 10% OFF E-Z GEL UNTIL 10/07/26
Use Coupon Code: PSJHWWGN
COMMON QUESTIONS
Frequently Asked Questions
Is this recipe safe for home canning? Yes. It is certified by the Utah State University Extension Service. Keep the amounts of tomatoes, onions, peppers, and vinegar exactly as written, since those set the acidity that keeps your salsa safe.
What other seasonings can I add? Anything you like! Common additions include: cumin, chili powder, garlic powder, onion powder, cayenne pepper, smoked paprika, chicken or tomato bouillon, or even fresh herbs such as cilantro, chives, parsley, scallions, mint, or oregano.
Can I change the amounts or the peppers? Do not change the amounts of tomato, onion, pepper, or vinegar. Those are locked for safety. The recipe calls for 2 pounds of peppers total, and you can choose your own mix of peppers to dial in the heat and flavor you like.
Why use E-Z Gel instead of simmering for hours? Simmering to thicken the salsa takes hours and cooks away flavor. E-Z Gel thickens it in minutes instead. It is a corn-based instant thickener, certified as canning-safe by the USU Extension Service and tested to hold up to canning temperatures.
How long do I process the jars? It depends on your elevation. Process 35 minutes at sea level, 40 minutes at 1,000 to 3,000 feet, and 45 minutes at 3,000 to 6,000 feet. These times are for pint jars.
Why does my salsa taste mild right now? Fresh canned salsa gets hotter as it sits, and the flavor keeps developing as it ages. That is also why we wait to add extra seasonings until we open a jar.
How do I know the jars are sealed? As they cool, you will hear a popping or clicking sound. Once they are cool, the lids should be firm and not flex when pressed. Remove the rings and store the jars in a cool, dark place.
How can I use this salsa? While it is delicious out of the jar, this salsa recipe is the perfect base for any other salsa. Add it to fresh diced mangoes, a little sugar, and fresh herbs for a delicious sweet-and-savory salsa. For a Southwest twist, add it to a can of corn and beans with a little cumin and chili powder.

Sign up for our newsletter for weekly discounts and 20% off your first order!
Naomi learned to cook before she could see over the counter. Growing as a Cornaby meant learning to put up jam before summer ended, making and canning homemade pie filling, and feeding a family with ingredients you could name. Five generations of tradition show up in every recipe she shares. Nothing fancy. Nothing artificial. Just food worth making.